Why a $5,000 Superbike Isn't Enough to Stop the Pain
Community observation suggests a frustrating pattern among dedicated road cyclists. You save up, research geometry charts, and finally purchase a high-end carbon machine. Yet, halfway through your Saturday group ride, your lower back tightens and your knees start to ache. The raw capability of modern carbon fiber often masks a basic disconnect with human biomechanics.
The typical break-in period riders endure is 3 to 4 weeks of riding 100 to 120 miles weekly before realizing the pain is structural, not muscular. Through ongoing fit clinics since 2021, I have watched countless cyclists try to adapt their bodies to the machine rather than adapting the machine to their bodies.
I decided to test the Liv Langma Advanced Pro not just out of the box, but by mandating a full clinical fit first to isolate the frame's actual performance from the variables of poor setup. We needed to bridge the gap between a premium build and a pain-free ride.
Critical Insight: A premium bicycle only delivers its promised performance when your skeletal structure is properly aligned to drive power through the drivetrain.
Entering the Right Ride Simulator
Riders frequently ask if they can simply transfer the measurements from their old road bike to a new frame. The short answer is no. Transferring old measurements often means transferring old compensations.
To prevent this, the technician opted to start the simulator with a completely neutral XY coordinate baseline rather than importing the rider's previous road bike measurements, ensuring legacy bad habits weren't carried over. The Right Ride System methodology developed by Giant relies on a highly adjustable physical jig that isolates every variable before you ever touch the actual Liv frame.
The hardware itself is efficient. Under typical conditions, the simulator's crank arms adjust from 165mm to 175mm in roughly 2.5mm increments. Stem length can also be swapped on the jig in under about 45 seconds without unbolting faceplates. This rapid adjustability allows the fitter to test multiple configurations in real-time without losing the rider's muscular feedback.
The Data Behind the Fit: Knee, Trunk, and Shoulder Angles
For beginners, a bike fit often feels like guesswork based on comfort. As you progress, you realize it is a strict mathematical equation balancing power output against aerodynamic drag. The biometric data points captured during this process dictate how efficiently you move.
Dialing in the Lower Body
Measurements were captured dynamically while pedaling at 90 rpm under a 150-watt load. Under these specific conditions, target knee extension was dialed to about 142 degrees at bottom dead center. Hitting optimal knee extension angles for power transfer ensures the quadriceps and glutes fire in the correct sequence without overextending the hamstring.
Balancing Aerodynamics and Comfort
The upper body requires a more nuanced approach. We initially attempted a highly aggressive 42-degree trunk angle for maximum aerodynamics, but dropped it back to 46 degrees after observing excessive rocking in the pelvis during a 3-minute threshold effort. A lower front end is useless if it compromises core stability.
Recommendation: Always prioritize pelvic stability over a flat back. If your hips rock to reach the pedals or the drops, you are bleeding watts and inviting injury.
Cleat Placement: The Foundation of Pedaling Efficiency
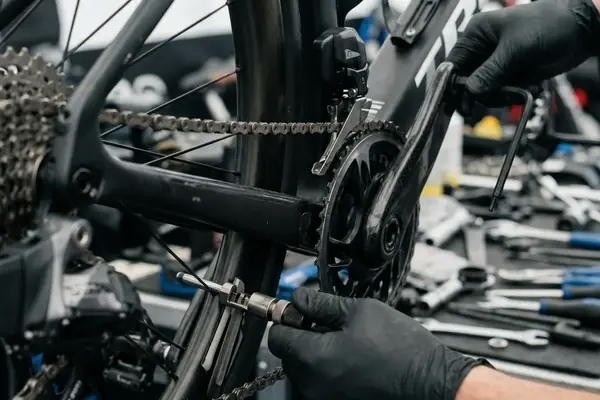
Cleat placement is the most critical, yet frequently overlooked, technical adjustment on any road bike. Millimeter changes at the shoe affect the entire kinetic chain up through the ankle, knee, and hip. A proven fit starts from the ground up.
During our session, the fitter prioritized fore-aft cleat positioning based on the first metatarsal joint before addressing rotational float, establishing a stable platform before tweaking the Q-factor. Specifically for this test, cleats were shifted rearward by 4mm and angled 2 degrees outward to accommodate a natural heel-in pedal stroke.
Standard cleat adjustments have limits. Riders with leg-length discrepancies of just over 5mm requiring shims rather than standard cleat adjustments will need specialized hardware to balance their pedal stroke effectively.
Tarmac Test: First Impressions of the Liv Langma Advanced Pro
Clinical data means nothing if it fails to translate to real-world ride feel. We selected the rolling terrain of the River Trail out to Pinnacle Mountain for the test loop—specifically to force frequent transitions between seated climbing and out-of-the-saddle sprinting.
The Liv Langma Advanced Pro responded beautifully to the dialed-in geometry. The bike felt planted during high-speed descents and remarkably snappy when accelerating out of tight corners. On the return trip, the true success of the Right Ride adjustments became apparent.
I completed a 42-mile loop with 2,100 feet of elevation gain in 2 hours and 18 minutes. Most importantly, I experienced zero lower back fatigue on the final 12-minute sustained climb. The alignment allowed the frame's stiffness to work for me rather than against me.
Scope and Limitations: Is a Clinical Fit a Magic Bullet?
While my Retül Fit background and kinesiology training inform these observations, individual biomechanics dictate that no single formula applies universally. A static clinical fit relies entirely on the rider's flexibility on the day of the test; a sudden increase in training volume or a minor hamstring strain will immediately invalidate the baseline trunk angle measurements.
You cannot buy a fit that compensates for a basic lack of core strength. Core strength degradation over a 4 to 6 month off-season typically alters a rider's sustainable drop-to-bar ratio by 10mm to 15mm. What feels guaranteed to be comfortable in August may feel agonizing in March.
The Reality of Outdoor Variables
Indoor simulators cannot replicate road vibration. You will often see saddle pressure mapping varying drastically between a 15-minute indoor test and a 3-hour outdoor ride on chip-seal roads. The micro-adjustments your body makes to absorb road chatter change how you sit on the bike.
Risk Factor: Assuming your fit numbers are permanent will lead to long-term discomfort as your body changes through different training phases.
We concluded the review by establishing a post-fit check-in schedule, deciding that a follow-up assessment is necessary after a full season of riding rather than assuming the initial numbers are permanent. Treat your bike fit as a living document, adjusting it as your fitness, flexibility, and goals evolve.